CSV Import
Overview
Section titled “Overview”The CSV Import feature allows you to bulk import test case or test execution data from a CSV file. The import process is organized into a four-step wizard for a smooth and intuitive user experience.
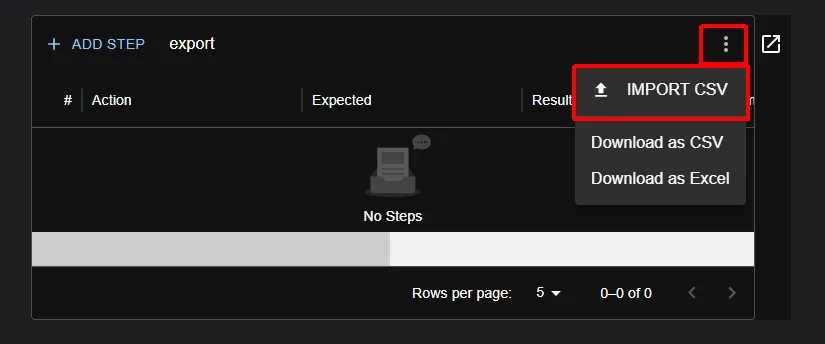
Before you start
Section titled “Before you start”- Open the Confluence page that contains the test macro you want to import into.
- In the macro toolbar, click the ⋮ (more) button and select IMPORT CSV. The import wizard opens.
Key Features
Section titled “Key Features”- Upload and preview CSV files
- Automatic column mapping
- Import progress display
Important Notes
Section titled “Important Notes”- A header row is required in the CSV file
- Use a file exported via the CSV Export feature as a reference (CSV Export)
- Attachments (e.g., images, videos) cannot be imported at this time
Step-by-Step Instructions
Section titled “Step-by-Step Instructions”Step 1: CSV File Selection
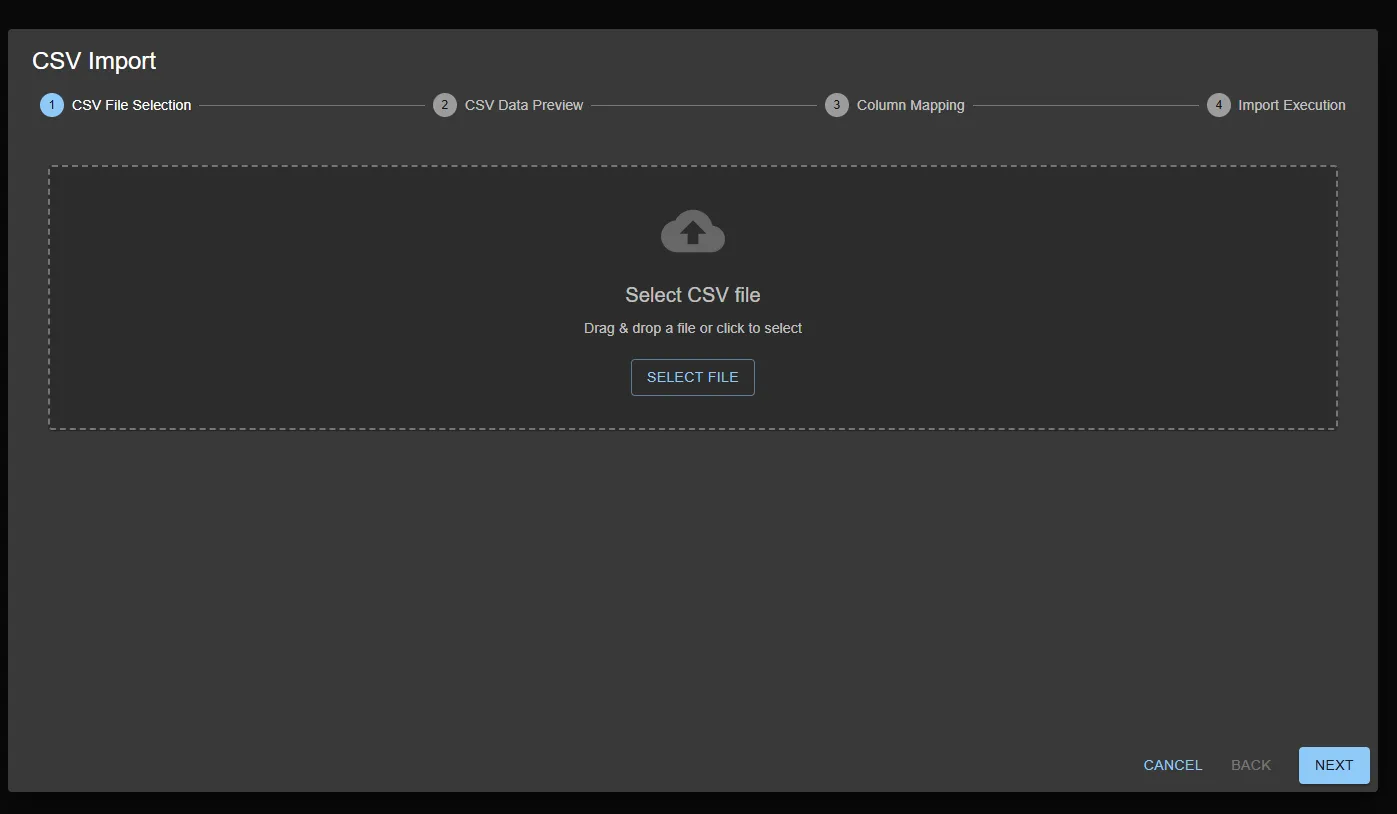
Section titled “Step 1: CSV File Selection”Select the CSV file you want to import.
Instructions
Section titled “Instructions”-
How to select a file:
- Click the Select File button to open the file selection dialog
- Or, drag & drop the CSV file directly
-
File requirements:
- Format: CSV (.csv extension)
- Encoding: UTF-8
- Required: The first row must contain a header row
-
After successful load:
- A message, “CSV file loaded successfully!” will appear
- The process automatically moves to the next step
Step 2: CSV Data Preview
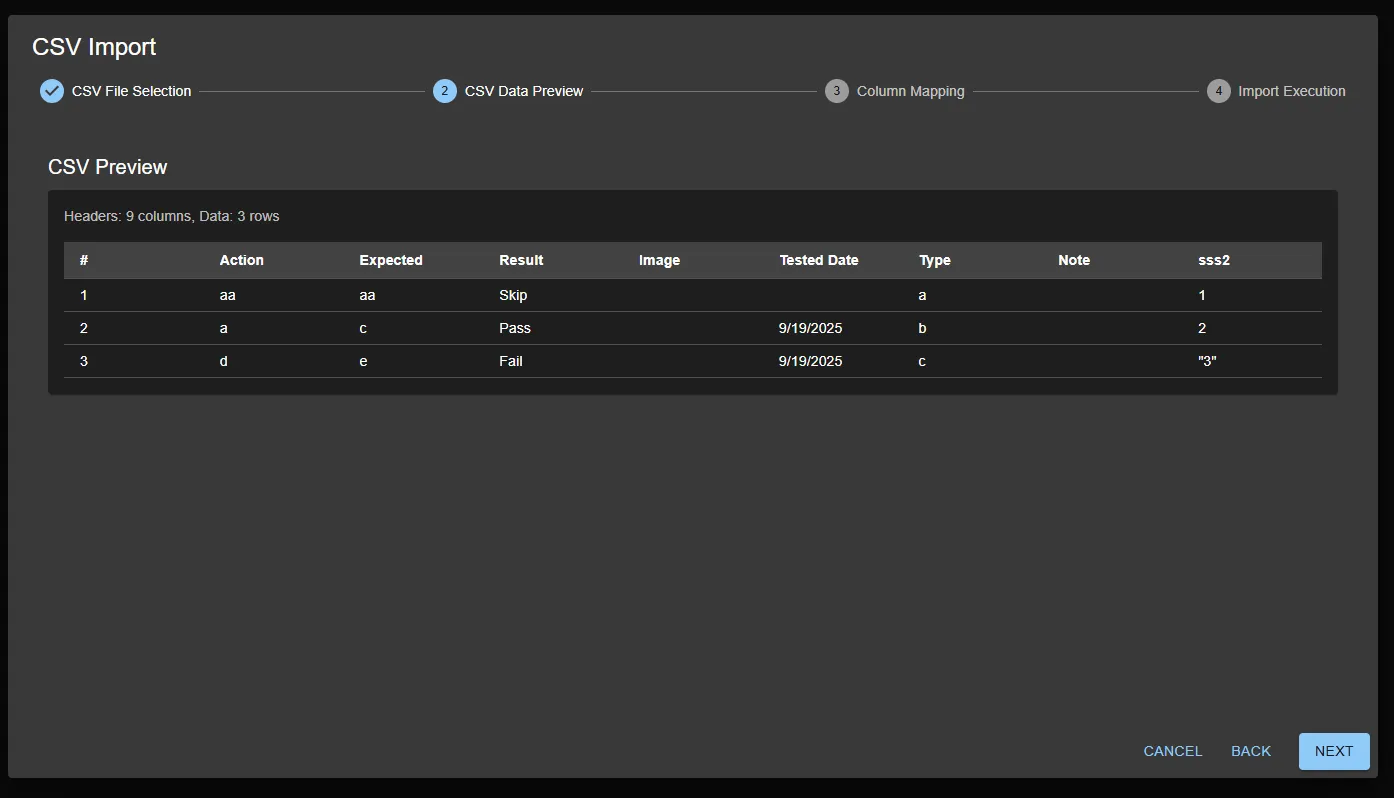
Section titled “Step 2: CSV Data Preview”Preview the contents of the selected CSV file.
Displayed Information
Section titled “Displayed Information”- Header Information: Number of columns and rows detected
- Data Table: Displays CSV data in a table format
Checkpoints
Section titled “Checkpoints”- Ensure the header row is correctly recognized
- Verify that data loads as expected
- Check for garbled text or formatting errors
Step 3: Column Mapping
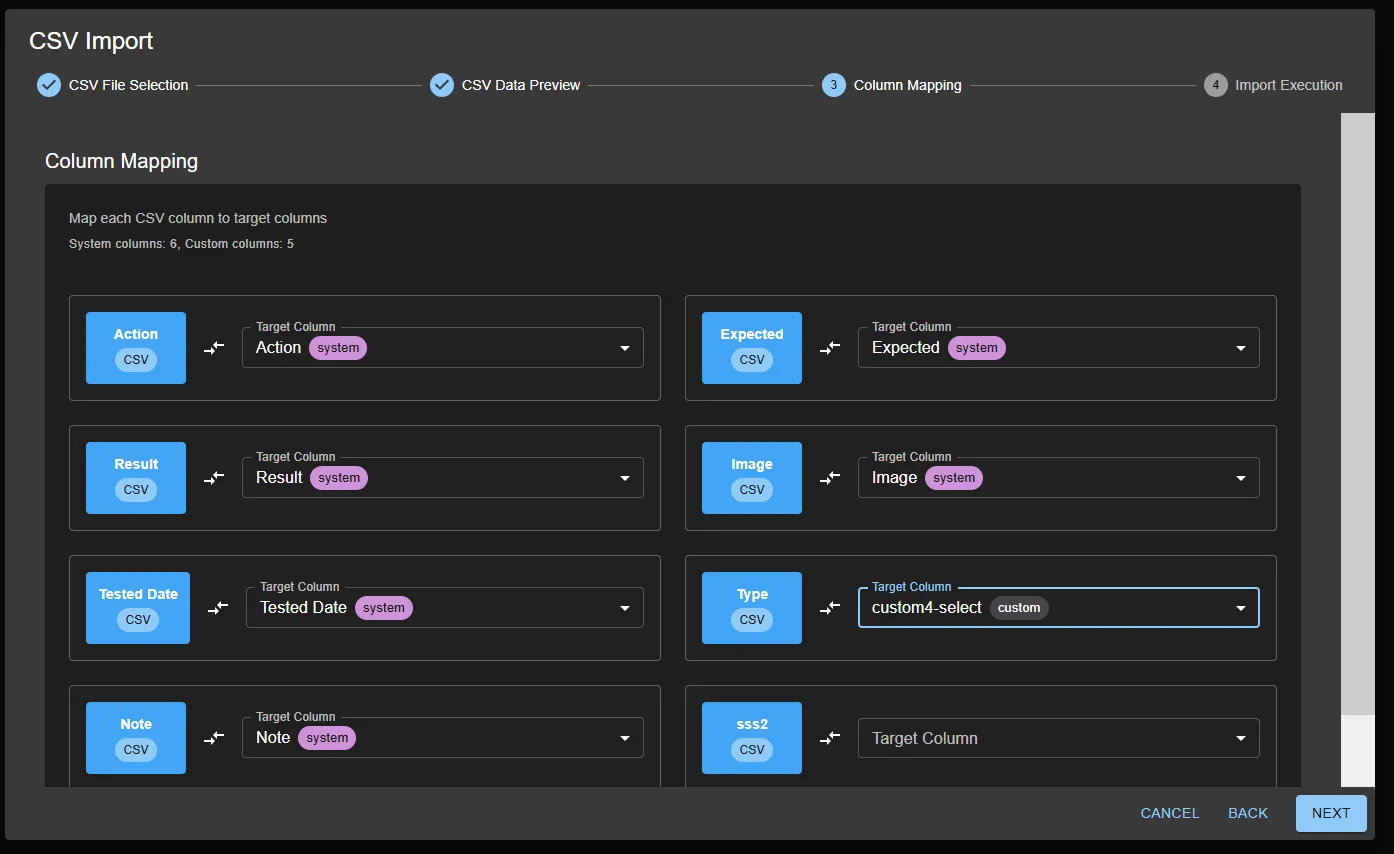
Section titled “Step 3: Column Mapping”Map each CSV column to the appropriate test macro column (system or custom columns).
Automatic Mapping
Section titled “Automatic Mapping”The system automatically maps columns using the following rules:
- Exact match: CSV column name matches the system column name exactly
- Partial match: A part of the column name matches
- Similarity calculation: Levenshtein distance similarity ≥ 30%
Column Types
Section titled “Column Types”- System columns: Standard system columns (e.g., Action, Expected, Result)
- Custom columns: User-defined custom columns
Manual Adjustments
Section titled “Manual Adjustments”- If automatic mapping is incorrect, manually select the correct column from the dropdown
- Select None for columns that do not need mapping
- The column type (system/custom) is displayed on the right side of each column
Step 4: Import Execution
Section titled “Step 4: Import Execution”Run the data import in the final step.
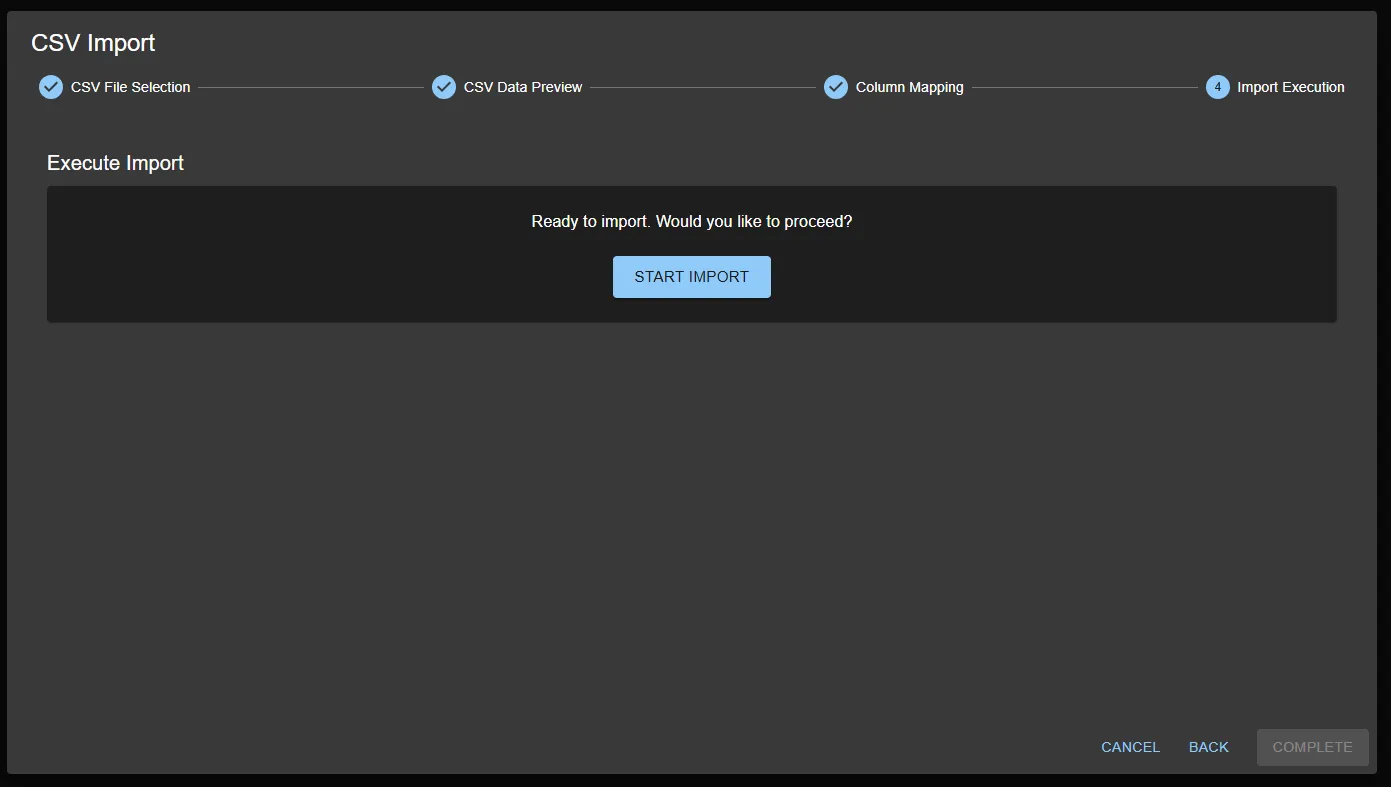
Start Import
Section titled “Start Import”- Click the Start Import button
- The import process begins and progress is displayed
Expected result:
- On success, a completion message is shown and the macro table displays the imported rows.
- On failure, an error message explains what went wrong, and the previous content of the macro is restored automatically.
Limitations
Section titled “Limitations”Current Limitations
Section titled “Current Limitations”- Attachments: Importing images or videos is not supported
- File Format: Only CSV format is supported (Excel not supported)
- Encoding: Only UTF-8 encoding is supported